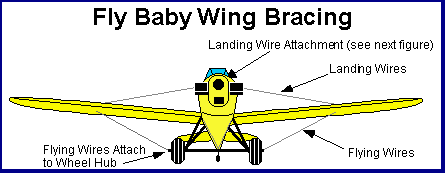
The landing wires join together at a large turnbuckle on a shelf below the instrument panel. This Master Turnbuckle is the only one that has to be turned or adjusted during the folding/unfolding process. The individual turnbuckles for the landing and flying wires aren't touched.
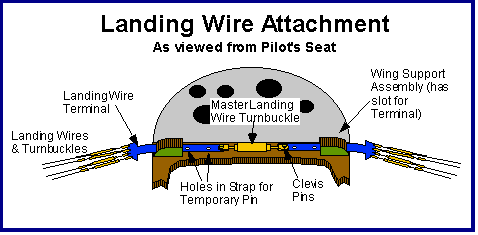
Folding the wings does not affect the wing's rig, since the angles are set by the individual turnbuckles. The landing wires disconnect at the master turnbuckle, and the left and right wing's sets of flying wires are disconnected by pulling the clevis out of the shackle at the wheel hub.
Of course, you want to disconnect all that without having the wingtip come slamming down or bending the aileron pushrods.
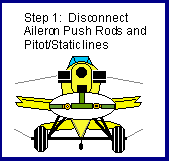
STEP 1: Start the fun by disconnecting the aileron pushrods at
the control stick and by disconnecting the pitot and static lines. If your
plane is built per plans, the aileron pushrods have rod-end bearings at
the end, which fit into a sort of yoke on the bottom of either side of
the control stick. This pushrod is held in place by a long clevis pin,
with a safety clip/wire/pin holding it in place. Need I remind you to save
the clevises and the clips?
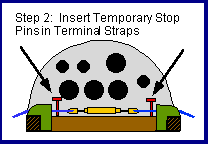
STEP 2: Next, you want to drop some sort of temporary pins into
the Landing Wire Terminal straps, just inboard of the Wing Support Assembly.
These keep the wings from dropping all the way should you accidentally
unscrew the Master Turnbuckle a bit too far. They might get a bit marred
in the process, so just use some junk bolts.
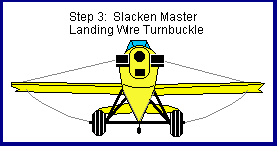
STEP 3: Speaking of the Master Turnbuckle...start turning the
barrel to slacken the landing wires. Builders usually have a bolt or cotter
pin dropped down the "Judas Hole" in the center of the turnbuckle to keep
it from rotating. You'll need to remove this pin first, of course. Unscrew
the turnbuckle until the flying wires (the ones UNDER the wing) are slack.
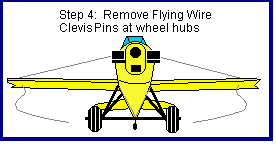
STEP 4: With the flying wires slack, remove the safety pin, cotter, or what have you that holds the clevis for the flying wire shackle in place, then remove the clevis and the shackle itself. Repeat for the other side.
The most convenient method for securing these clevis pins is with an
aviation-grade safety pin. If you do use one of these, however, safety
it with a cable tie or safety wire. Checking the plane over after a flight
to a grass strip, I found one of these safety pins open. I suspect it got
unhooked on the grass somehow. So safety your safety...it IS the wings,
after all.
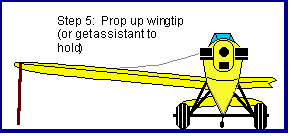
STEP 5: Here comes the tough part, when doing the process solo:
You have to raise one wingtip to take the tension off the landing wire
on that side. If you've got an assistant, let him or her do it. Otherwise...Figure
8-4 in the plans shows a "broomstick" with a bolt in the end to hold up
the wingtip. The prototype actually had a socket in each wingtip designed
to accept the end of this broomstick. You'll have to do likewise, or have
the right-height sawhorse ready.
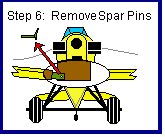
STEP 6: With the wing tip up and the landing wire slack, remove
the spar pins for that wing. It typically takes some wiggling to get the
pins free. Getting them back in is even tougher. I've usually ended up
having an assistant wiggle the wingtip up and down and back and forth while
I try to shove the pins through.
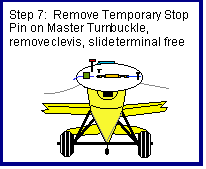
STEP 7: With the spar pins out, pull out the temporary stop pin
in the Master Turnbuckle for the wing you're working on. Remove the clevis
pin from the strap to the Turnbuckle for that wing, and the strap should
slide right out through the slot in the Wing Support Assembly. Tie down
or otherwise secure both the landing and flying wires for the wing you're
doing.
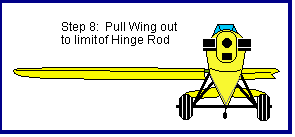
STEP 8: Getting near the end, now. Pull the wing straight out
from the fuselage until it hits the stop in the Hinge Rod. If you bought
the Fly Baby and haven't folded the wings before, make sure you HAVE a
hinge rod: Remove the small covers on the inboard leading edge of each
wing...you should see a large-diameter aluminum tube going into the fuselage
side ahead of the forward spar. Lift up the floorboards and make sure it
has a bolt through the end to act as a stop.
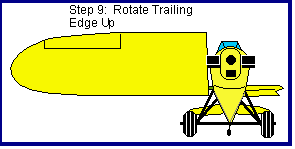
STEP 9: With the wing at the limit of the hinge rod, the spar
plates and the aileron pushrod should be clear of the fuselage side. Rotate
the trailing edges of the wing up (i.e., aileron on top)
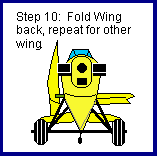
STEP 10: Now that the wing is vertical, you can just walk it backwards to snug the wing alongside of the fuselage.
If you build the plane exactly per plans, there'll be a steel rod poking out from the leading edge and a socket in the horizontal stabilizer to accept it. Slide the rod into the socket, and the wing is secure.
However, I've been told that this system shouldn't be used while the airplane is being trailered...the shocks from chuckholes, etc., exceed what the horizontal stabilizer spar was designed to carry. If you're going to do anything but just shove the airplane aside, rest the leading edges atop styrofoam or other pads on the ground outboard of the tips of the horizontal stabilizer.
This may sound like a long, involved, process, but most of it is pretty simple. Bowers could fold or unfold the wings in fifteen minutes; I can see how that would be possible. Even fifteen minutes, though, is a bit long if you're just going to take the plane up for fifteen minutes of touch-and-goes.
While trailering the airplane to the airport is a bit involved for day-to-day use, wing folding is convenient to help share hangar space. Before you resign yourself to folding the wings, though, check if you can share the hangar space without folding the wings. My Fly Baby snuggles quite nicely with a Vari-Eze; the Prototype spent about four years sharing with a Long-EZ. A Fly Baby should nestle easily with a high-wing taildragger without having to fold the wings.
Alternatively, see if you can get away with only folding ONE wing. If you can leave the left wing out, you don't have to disconnect the pitot/static lines and you have to muck around with only two spar pins.