
 Years ago,
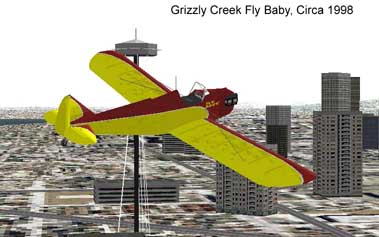
a company named Grizzly Creek Aviation distributed a Fly Baby model for
Microsoft Flight Simulator '98. It was pretty neat, but the
advances
in the display abilities of more modern computers and the amazing
graphics
of the newer version of MSFS soon left it behind. Grizzly Creek
went
out of business, and Fly Baby fans were left looking for someone to
generate
a brand-new model that took advantage of the vastly improved
capabilities
of the newer Flight Simulator versions.
Years ago,
a company named Grizzly Creek Aviation distributed a Fly Baby model for
Microsoft Flight Simulator '98. It was pretty neat, but the
advances
in the display abilities of more modern computers and the amazing
graphics
of the newer version of MSFS soon left it behind. Grizzly Creek
went
out of business, and Fly Baby fans were left looking for someone to
generate
a brand-new model that took advantage of the vastly improved
capabilities
of the newer Flight Simulator versions.
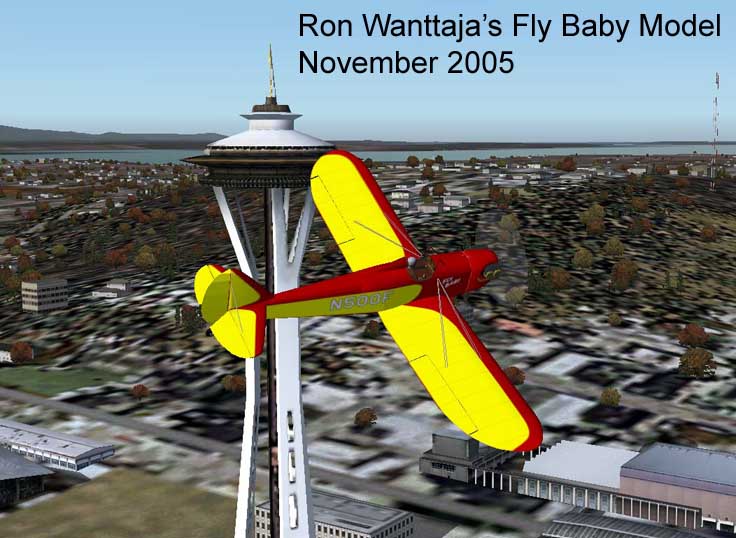
Since no one else did...I figured to give it a shot. In late October 2005, I bought a copy of Abacus Software's Flight Simulator Design Studio (FSDS) and went to work. I had no experience in aircraft design for Microsoft Flight Simulator, nor did I have any experience in 3-D modeling or CAD software.
But the tutorials included with FSDS aren't too bad, and additional tutorials are available on the Abacus Software web page. I started completely from scratch with a set of 3-view drawings, and went to work. I made a lot of errors, had to re-cover a lot of ground. But I managed to generate what I think is a pretty good-looking 3-D model of the Fly Baby.
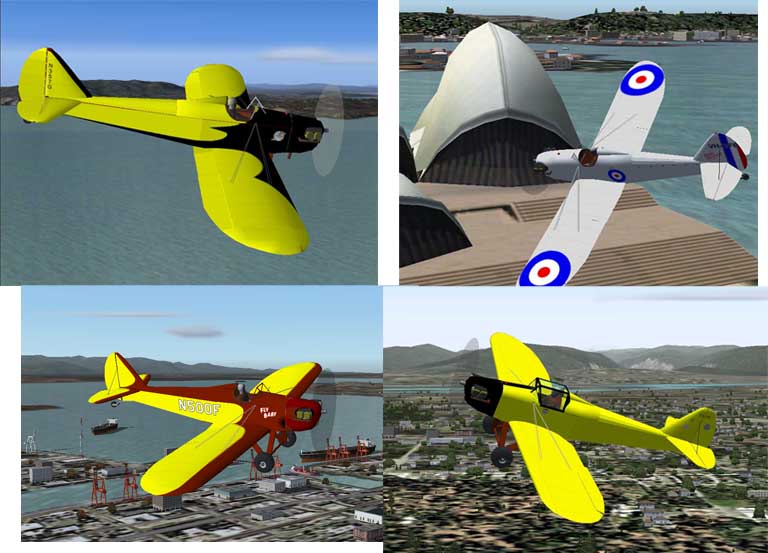
 The
simulation
includes a moderately-detailed Virtual Cockpit, animated controls and
pilot
figure, and nine Fly Baby variations, including planes from five
different
nations and four physically different models. There are even
three
"Easter Eggs" for you to find! (one easy, one moderate, and one a bit
harder).
The
simulation
includes a moderately-detailed Virtual Cockpit, animated controls and
pilot
figure, and nine Fly Baby variations, including planes from five
different
nations and four physically different models. There are even
three
"Easter Eggs" for you to find! (one easy, one moderate, and one a bit
harder).
All but one of the simulated airplanes are real, operational, Fly Babies. Aircraft in the FS2004 V2 release include:
 Links to
photos
of the actual aircraft can be found on the Bowersflybaby.com Photos
Page. There, you can search by the owner's name or the
registration
number.
Links to
photos
of the actual aircraft can be found on the Bowersflybaby.com Photos
Page. There, you can search by the owner's name or the
registration
number.
In some cases, I have taken some slight liberties with the aircraft configuration. It's easy to generate new "Textures" that repaint an existing aircraft, but making even a slight physical change to the aircraft requires the generation of a unique mode....not in itself difficult, but it gets to be a real hassle upgrading all the different models with any overall detail improvements or animation changes. So windshield and cowling shapes may not exactly match the actual planes. When there are gross differences in appearance, I have generated the appropriate unique model.
And...shoot, all these planes have different models of the small Continental engine. Some have A65, several have C-85s, and there are some O-200s rattling around in there, too. I haven't changed the flying qualities/performance with the different models...they all fly the same.
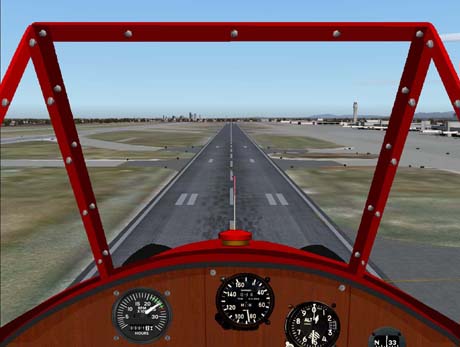 The
gauges were
a tough decision. Normally, folks expect at least the regulations
mandated by the Federal Aviation Regulations. But when it
gets
right down to it, Fly Baby pilots generally use just the airspeed, the
altimeter, and tachometer. So that's what I show in this
view...with
a little snippet of the compass showing on the far right. But if
you switch to the "Virtual" view, you'll be able to scan across the
panel
and see all the gauges (the oil temp and oil pressure are just dummies,
though).
The
gauges were
a tough decision. Normally, folks expect at least the regulations
mandated by the Federal Aviation Regulations. But when it
gets
right down to it, Fly Baby pilots generally use just the airspeed, the
altimeter, and tachometer. So that's what I show in this
view...with
a little snippet of the compass showing on the far right. But if
you switch to the "Virtual" view, you'll be able to scan across the
panel
and see all the gauges (the oil temp and oil pressure are just dummies,
though).
One point I'll admit right now: All the instrument layouts are the same. I didn't really have to do it that way, but I wanted to keep the Airspeed and Altimeter near the top to make it easier to monitor these gauges in flight. The physical environment of the instrument panel changes...the nose and windshield frame will be of the proper color...but the gauge layouts will be identical between aircraft.
But don't expect too much change in the handling. The Fly Baby is a seat-of-the-pants airplane, and a PC-based simulator just CANNOT replicate it. For instance, the Fly Baby's pitch control is so light that the airplane doesn't even need elevator trim...but the centering springs on the typical home joystick tend to force use of the trim system.
So...have fun, but don't believe you're getting any real Fly Baby training.
First thing, you need to download the ZIP file containing the simulation:
This version is about 6 Megs in size. If you're on a dialup version and don't want to tie up your phone line, you can get the dialup version. It had only the basic N500F model in it.
Run Winzip, and extract the contained files to a temporary directory. You need to actually let Winzip extract the ZIP file, rather than just opening the file and manually dragging out the contents. By running the extractor, Winzip will re-create the all-important folder structure.
Somewhere near the top of that folder structure is a folder called "Fly_Baby" that contains the aircraft.cfg file as well as several other folders and files. Drag this 'Fly_baby" to the "Aircraft" folder in MSFS. Crank up MSFS, and you'll see the plane listed under "Bowers". If it's not there, try exiting MSFS and re-entering.
Duplication and distribution of this model for noncommercial purposes is authorized...please leave the "readme.txt" file in place.
You can also download the Biplane model.
Version 1.2: Released 23 November 2005. Visual bugs eliminated, flight model tweaked to better simulate aileron effectiveness and power-off glide angle. Added visual model for Jeff Patnaude's Fly Baby.
Version 1.21: Released 27 November 2005. More visual bugs corrected, added the "Bristol Balderdash" variant to the stable, plus a "old Elvis" version of N500F (note the darker red and an exhaust burn right behind the cowling. Long story. :-)
Version 1.2.2: Released 2 December 2005. Replaced Cub aerodynamic model with a custom one.
7 December. Generated FS2002-compatible version.
Version 1.5: Released 18 December 2005. Added a Canadian Fly Baby to the mix. Hit Shift-E to open and close the canopy. Also added a navigation "feature" to the N500F models...click the button on the instrument panel.
Version 2.0. Released 8 January 2006. Massive upgrade, and conversion to FS2004 standard. Pilot figure "dressed up" and animated. Virtual cockpit greatly enhanced. Exterior detail significantly upgraded. Sound alias changed from Cessna 182 to the Piper J-3 Cub, which is pretty darn good-sounding. Four additional aircraft models added.

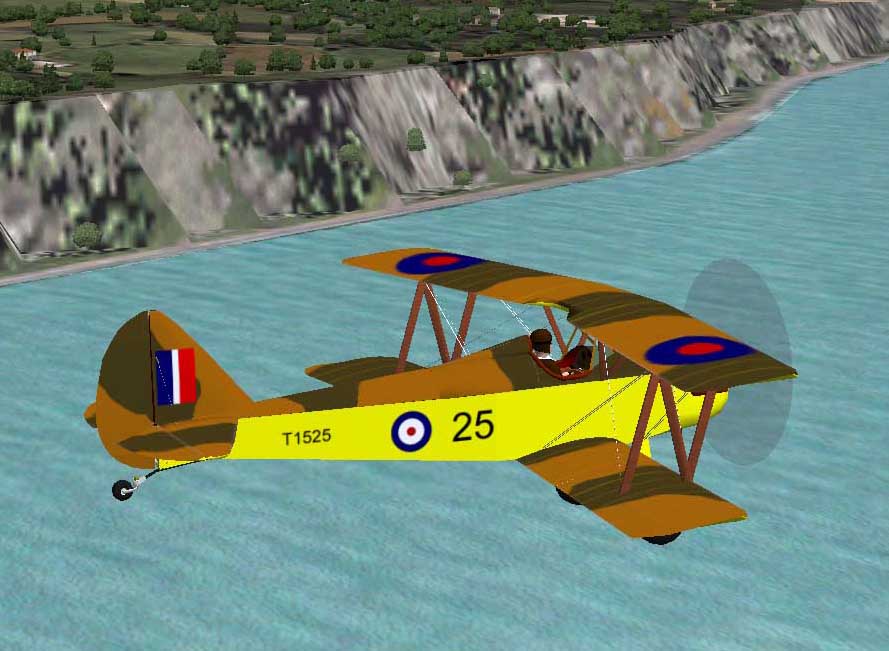
The designer, Peter M. Bowers, planned from the start that his Fly Baby would be able to sport both monoplane and biplane wings. Despite the prototyping flying in 1960, though, Bowers didn't get around to building the first set of biplane wings for almost ten years.
The biplane configuration doesn't just add a top wing...the monoplane wings are removed completely, and replaced with four new wing panels and a center-section joining the top wings. The individual panels are shorter and narrower in chord than the monoplane wing panels, which leaves the biplane with only about 25% more wing area than the monoplane.
To allow the pilot access to the cockpit, Bowers shifted the top wing forward several feet. To keep the Center of Pressure of the wings in the same location, it was necessary to sweep back the wings about seven degrees. At the right angles, the plane looks a bit like a Dehavilland Tiger Moth or a Bucker Jungmeister. The monoplane fuselage needs some slight additions to make it biplane-capable, mostly to provide the attach points for the bracing wires. Tangs are added atop the fuselage just aft of the firewall (for the cross-wires on the center section), and on the fuselage sides just above the forward landing gear attach point and above the rear spar carry-through. A cross-brace is installed just in front of the fuel tank to provide attach points for the cabane struts (the exiting slots for the Master Turnbuckle are used for the aft mounts for the cabane struts).
Out of the over five hundred Fly Babies built and flown, only a scant dozen have been biplanes. Less than a handful...two, as far as I am aware...have actually flown in both configurations.
Why so few biplanes? Several reasons, I think. First, the biplane wings are no simpler to build than the monoplane wings...and there are four of them instead of two of them. Second, the second wing increases the drag quite a bit. The extra wing area helps the aircraft climb, but the additional drag keeps the speed down. Third, the fantastic visibility of the monoplane Fly Baby is greatly restricted when the biplane wings are installed. The one advantage is that the wing bracing is no longer dependent upon the wing bracing...the builder can install shock absorbing landing gear.
Soon after the monoplane configuration release, requests poured in (ummm...one or two requests, at least) for the biplane version. Paint schemes were a bit more difficult to come up with, since few biplanes were built. I included N500F, of course, and added a requested "Fantasy" paint job, showing a Fly Baby painted like a WWII British Tiger Moth.
Click Here to get the zip file.
Run Winzip, and extract the contained files to a temporary directory. You need to actually let Winzip extract the ZIP file, rather than just opening the file and manually dragging out the contents. By running the extractor, Winzip will re-create the all-important folder structure.
Somewhere near the top of that folder structure is a folder called "Fly_Baby_Biplane" that contains the aircraft.cfg file as well as several other folders and files. Drag the entire 'Fly_Baby_Biplane" folder to the "Aircraft" folder in MSFS. Crank up MSFS, and you'll see the plane listed under "Bowers"...you'll have to select "Fly Baby Biplane" under "Model." If it's not there, try exiting MSFS and re-entering.
Duplication and distribution of this model for noncommercial
purposes
is authorized...please leave the "readme.txt" file in place.
Dave Ryder has also converted it to FSX-compatible format.
However, the animation and a lot of other features of the latest models are incompatible with FS2002. I am continuing to keep the old model available...it works pretty good, but doesn't have the animation and extra aircraft that the FS2004 version does.
Run Winzip, and extract the contained files to a temporary directory. You need to actually let Winzip extract the ZIP file, rather than just opening the file and manually dragging out the contents. By running the extractor, Winzip will re-create the all-important folder structure.
Note that the FS2002 version seems a bit more sluggish on the controls than the FS2004 model. Not sure why that is, but it's at least flyable.
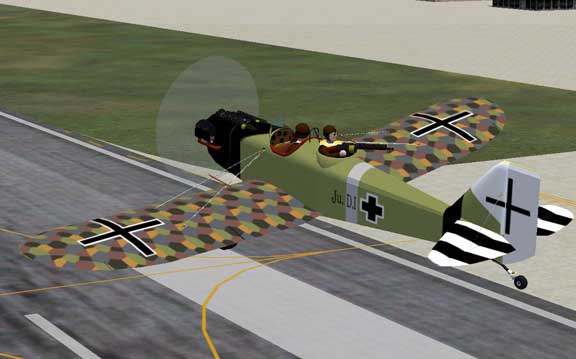
I took Ray's lead and generated three additional CFS2 models to represent the major combatants of WWII. While you're certainly (HA!) at a disadvantage if you try to use these to dogfight "real" adversaries, with a few minutes work, you can adjust the settings so that any of these planes are available as computer-controlled adversaries in the 'Quick Combat' mode. This lets you fly one model of Fly Baby to dogfight another...an even match. Look for a file named "qc_plane.qcb" in the "QUICKCOM" folder where CFS2 is installed...it's the folder that defines what airplanes are available in Quick Combat. Open it with 'Notepad,' and you'll see how aircraft entries are made...just add additional entries with the appropriate notation for the Fly Baby models. Make a backup copy before you change it, though!
Before you ask: I don't have versions for Combat Flight Simulator 3, the latest version. Microsoft made signficant changes to the aircraft definitions for CFS3, and I'd have to start from scratch with a new design program.
Below are the descriptions and download links for the four CFS2
aircraft
models. Download the files, unzip them, then transfer the
resulting
folders to the "Aircraft" directory in CFS2.
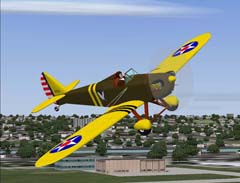 |
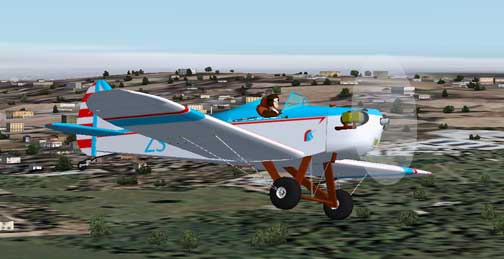
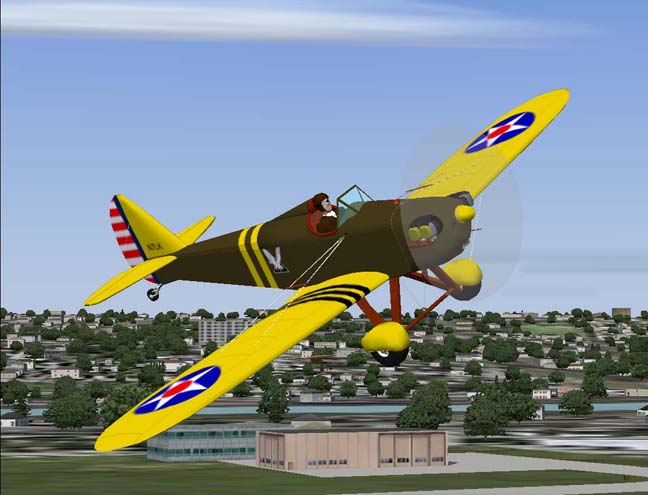
Army Air Corps "Snow Bird"This version is a re-use of the FS2004 Fulton paint scheme. It represents the paint scheme used by US Army Air Corps P-26s of the "Snow Owls" squadron during the mid-1930s. |
 |
Imperial Japanese Navy Mitsubishi "Claude"The Fly Baby has a slight similarity to the Mitsubishi A5M, the immediate predecessor of the immortal "Zero." This is an attractive prewar Japanese Navy paint scheme. |
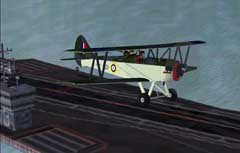 |
Royal Navy "Stringbag"The British Royal Navy's Fairey Swordfish torpedo plane was a rarity...a biplane that stayed in front-line service practically through the entire war. Torpedoes launched from "Stringbags" crippled the German battleship Bismarck sufficiently to allow the British fleet to catch up and finish the job, and a Swordfish attack on an Italian navy base gave the Japanese the inspiration for the Pearl Harbor attack. |
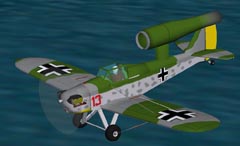 |
Luftwaffe "Reichenberg"OK, I'll admit it: I'm just getting silly, here. But the Germans did make a manned version of the Fieseler Fi-103 (aka, "V-1" or "Buzz Bomb"), under the code name "Reichenberg." Famed female test pilot Hanna Reitsch did much of the initial flight testing. I was just looking for an excuse to do something weird to the outside of a Fly Baby, and figured I'd just add the "stovepipe." The engine is non-functional, and doesn't affect the flight characteristics. |
Some folks like the warbird paint schemes, and want to fly it in the MSFS 2004. Since my design process builds the CFS2 models in FS2004 *anyway*, I've put all the models in a single folder. Download, unzip, and put the "Fly_Baby_Warbirds" folder in the 'Aircraft' folder in FS2004. When you run the program, the aircraft will still be under "Bowers" for the manufacturer, but use the "Model" pull-down to select "Fly Baby Warbirds." You'll have all the CFS2 planes above. Plus I add a few more when the mood strikes....
Download the Warbirds for FS2004
These models are actually a slight change from the original FS2004
ones.
They perform the same, but the visual model is a bit more complex to
allow
depiction of typical military camouflage paint schemes. However,
the "Stringbag" biplane uses the same flight model as the
monoplanes...it
doesn't have the higher drag than the normal biplane
model.
A note on the models: I made a slight change when I developed the "Warbirds" models above: These have a separate texture file that defines the upper and lower surfaces for each wing. The original model uses one design on the top and bottom of both wings. This makes the repainting easier to do, but it doesn't allow different markings on left or right or top or bottom of the wing...all the wing surfaces are painted just the same.
So...if you've got a complex paint scheme to do, pick the Warbirds
model.
If not, you'll find the normal model has a lot less work.
