Eventually, I had to bite the
bullet.
I'd been fighting tachometer problems in my Fly Baby since February. It started out as a major-league shaking of the needle. I'd pull the drive cable out, lubricate it, and the tach would work fine on the next flight and be back to its old tricks the flight after that.
And it got worse. Pretty soon, the tach needle would shake a while, then just drop down to zero.
That got to be the litany, for about six months. I'd make a change, and for the next flight or two, the tach would work perfect. Then the same problems reappeared.
I tried everything, from a new tach (actuall, a borrowed used one) to a new tach cable. With everything else pretty much eliminated, the worst-case scenario was about the only one left: The tachometer drive on the back of the engine was bad.
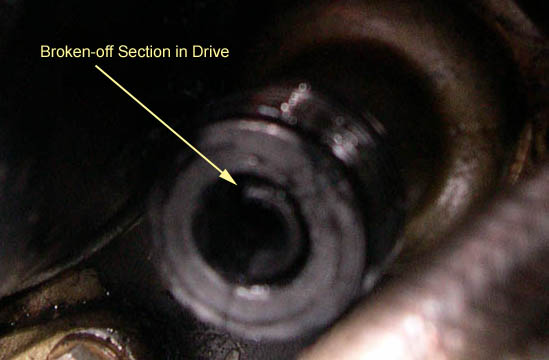 An out-of-focus, grainy digital camera
picture seemed to show the center drive section broken in
half. Problem confirmed.
An out-of-focus, grainy digital camera
picture seemed to show the center drive section broken in
half. Problem confirmed.
All right…now what?
 Finally,
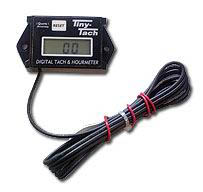
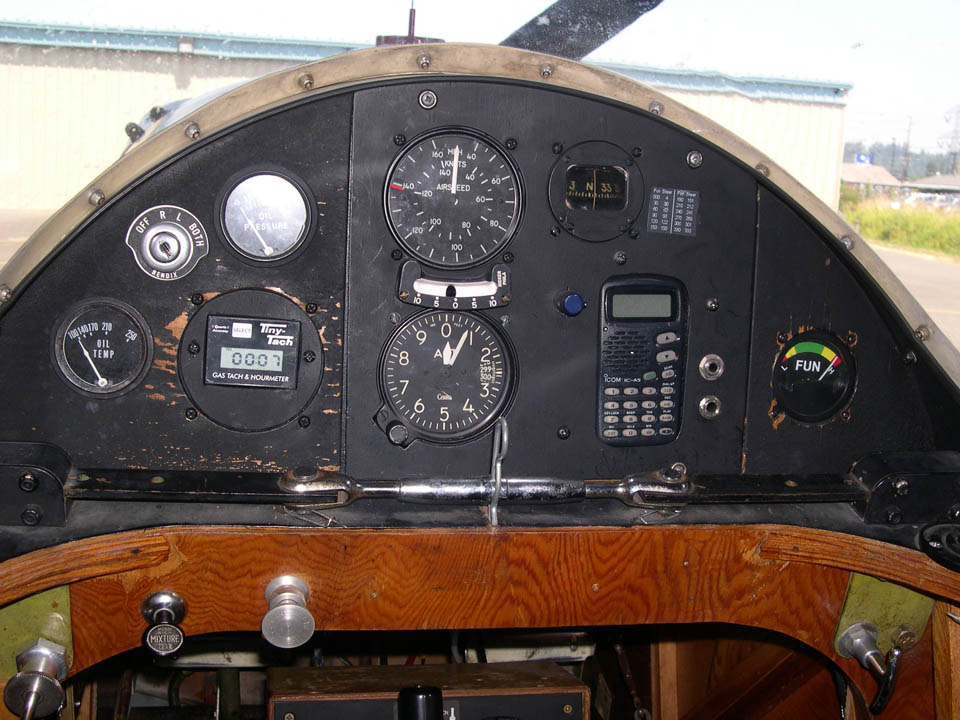
I noticed the "Tiny Tach" on the Aircraft
Spruce
web page. Seemed pretty good...got its signal by
wrapping a wire around a spark plug cable. From the
description, I wasn't completely sure which model to
buy. But when I went to the manufacturer's web page, I
found they had a universal "Commercial" model that also
updated faster than the standard units.
Finally,
I noticed the "Tiny Tach" on the Aircraft
Spruce
web page. Seemed pretty good...got its signal by
wrapping a wire around a spark plug cable. From the
description, I wasn't completely sure which model to
buy. But when I went to the manufacturer's web page, I
found they had a universal "Commercial" model that also
updated faster than the standard units.
I'd been fighting tachometer problems in my Fly Baby since February. It started out as a major-league shaking of the needle. I'd pull the drive cable out, lubricate it, and the tach would work fine on the next flight and be back to its old tricks the flight after that.
And it got worse. Pretty soon, the tach needle would shake a while, then just drop down to zero.
That got to be the litany, for about six months. I'd make a change, and for the next flight or two, the tach would work perfect. Then the same problems reappeared.
I tried everything, from a new tach (actuall, a borrowed used one) to a new tach cable. With everything else pretty much eliminated, the worst-case scenario was about the only one left: The tachometer drive on the back of the engine was bad.
An out-of-focus, grainy digital camera
picture seemed to show the center drive section broken in
half. Problem confirmed.All right…now what?
My first inclination was to
get the tach drive itself fixed. But the tach drive is
part of the oil pump idler gear, buried in the accessory
case in the back of the engine. I took a few moments
to contemplate what that meant: To replace it, I'd
have to remove the engine from the airplane, remove the
starter, generator, and both magnetos from the back of the
engine, then remove the entire accessory case to get at the
oil pump gears. And, of course, reassemble everything,
with a high preference to having things working properly
when I got done. And, frankly, I'm not really
qualified to break down an engine that far. To have it
done would probably run into a thousand dollars or more.
I started looking into the possiblility of an electronic tach. It was mostly disappointing. Most installed a transducer on the engine tach drive...which I figured wouldn't work in my case, since they probably would have the same problems with my damaged drive head. Others connected to a Bendix or Slick magneto...neat option, but I have Eisemans.
I started looking into the possiblility of an electronic tach. It was mostly disappointing. Most installed a transducer on the engine tach drive...which I figured wouldn't work in my case, since they probably would have the same problems with my damaged drive head. Others connected to a Bendix or Slick magneto...neat option, but I have Eisemans.
Finally,
I noticed the "Tiny Tach" on the Aircraft
Spruce
web page. Seemed pretty good...got its signal by
wrapping a wire around a spark plug cable. From the
description, I wasn't completely sure which model to
buy. But when I went to the manufacturer's web page, I
found they had a universal "Commercial" model that also
updated faster than the standard units.Only $65, so I went ahead and ordered one. It had
both a tach function as well as an hourmeter and two
service timers. It didn't need ANY other connection other
than to wrap the sensor wire around a spark plug cable. It
has a built-in battery.
When it came in, I went to the airport and tried a temporary installation. No go...tach read zero. I suspected the shielding on the tach cables, and a call to the tach vendor confirmed it. The tech recommended peeling the shielding back near a plug, but I didn't want to run my tach wire out into the slipstream.
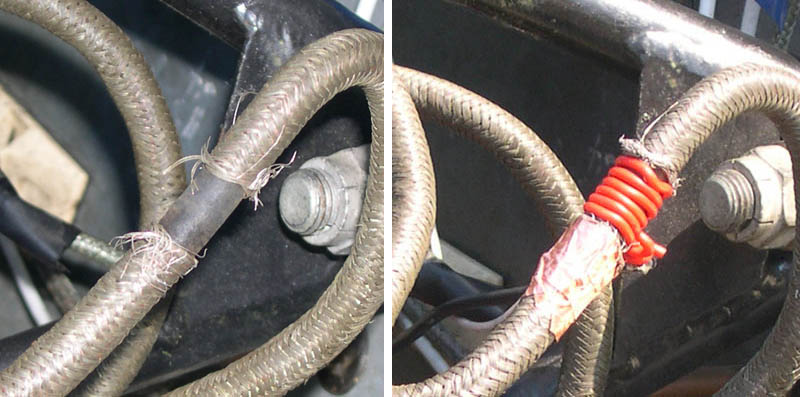
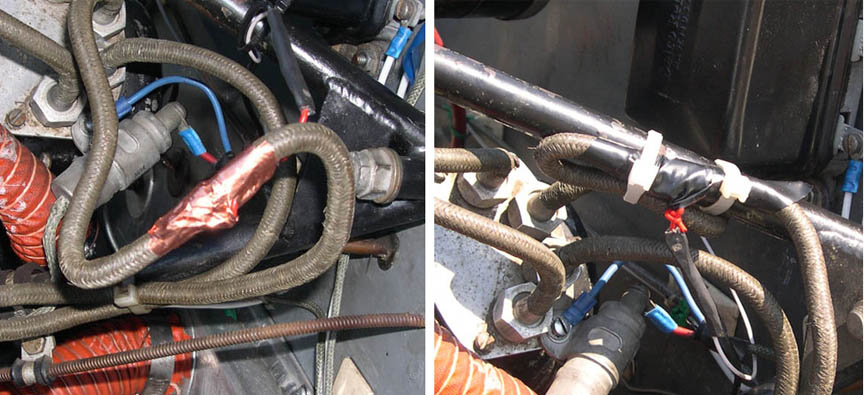
One of my spark plug wires is about 9" too long, and a previous owner had wrapped up the excess and tie-wrapped it to the engine mount. I figured I'd modify the wire there, so if I botched it, there'd still be enough cable to connect to the mag. So I picked at the shielding with a toothpick to make some openings, then carefully plucked away at it with an exacto knife. A few minutes work, and I had a 1" long section of cable free of the braid. (Note: More-modern plug wires may not have this external braid!)
The tach instructions said to wrap the red wire around the cable 3-4 times. The tachometer worked, but the idle was erratic. I eventually added a couple of extra turns to make the reading more stable.
When it came in, I went to the airport and tried a temporary installation. No go...tach read zero. I suspected the shielding on the tach cables, and a call to the tach vendor confirmed it. The tech recommended peeling the shielding back near a plug, but I didn't want to run my tach wire out into the slipstream.
One of my spark plug wires is about 9" too long, and a previous owner had wrapped up the excess and tie-wrapped it to the engine mount. I figured I'd modify the wire there, so if I botched it, there'd still be enough cable to connect to the mag. So I picked at the shielding with a toothpick to make some openings, then carefully plucked away at it with an exacto knife. A few minutes work, and I had a 1" long section of cable free of the braid. (Note: More-modern plug wires may not have this external braid!)
The tach instructions said to wrap the red wire around the cable 3-4 times. The tachometer worked, but the idle was erratic. I eventually added a couple of extra turns to make the reading more stable.
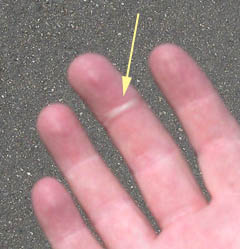 Problem solved...but now I had a nice little
burn-blister across the last joint of my middle finger.
Problem solved...but now I had a nice little
burn-blister across the last joint of my middle finger. 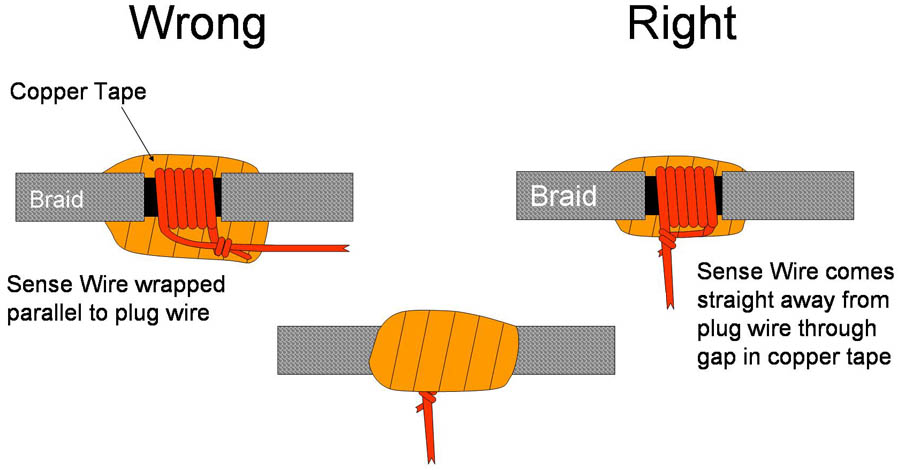
 Return to the Tech Page