 Fly Baby
N48ML Auxiliary Fuel Installation
Fly Baby
N48ML Auxiliary Fuel Installation
Text
and Photos by Matt
Michael
June
2010
Everybody
had a different "mission" for their Fly Baby. Most of us use our
airplanes for local fun flying, but Matt adds the phase "...and serious
cross-country machine..." to his mission statement.
To support his mission, Matt has performed some real cool modifications
to his Fly Baby. He's added a canopy
and a baggage compartment, and in this
installment, explains how he added another ~hour to the range of N48ML
by adding an auxiliary fuel tank.
Most Fly Babies don't need an
additional tank... the standard fuel tanks give 2-3 hours of range, and
for me at least, I'm *quite* ready for a break by that point.
Matt's system is nice because it can be added to planes after they're
built. So don't think you have to put one of these in during
construction, although if you are positive you'll need the range, the
job will be easier.
The impact of the tank on CG...and the obvious dangers involved in
routing fuel around the aircraft...is something that every
builder/owner should be aware of. This is a description on
how Matt added a fuel tank in a fashion that met his personal safety
standards. No claim is made that this solution is approved
or approvable by any other standard. Any changes to the
basic design of the Fly Baby are at the owner's own risk.
RJW
I struggled long and hard to come up with an auxiliary fuel tank
design. The final installation is so simple, cheap, and
straightforward you would laugh at all my initial concepts. I
considered individual tanks for the spaces under the floor panels and
even something external like the baggage bomb. I mocked up a
cardboard custom fitted tank for the baggage compartment but when I
showed it to my welder buddy I about fainted at the cost estimate.
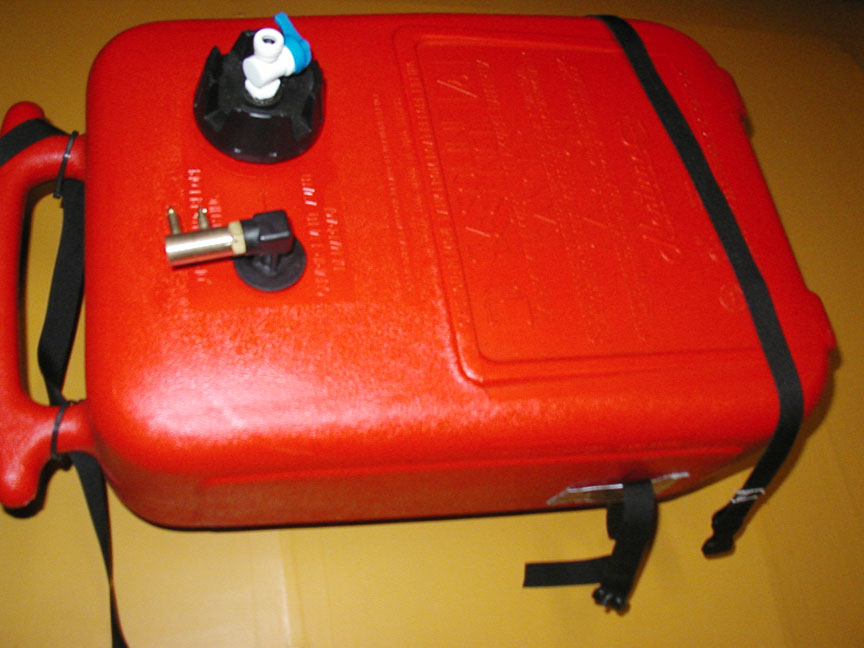
Somehow after looking at dozens of pre-made gas tanks I settled on this
simple, cheap, rugged marine tank that in retrospect is practically
custom made for this application! It’s got a nice handle, a
screened pick-up tube that is threaded for a standard marine quick
connect, and a vented cap. Best of all, it cost less than
$40! All I had to do was put a little valve in place of the cap
vent and I was ready to plumb it in. Its’ capacity is 6 gallons and it
weighs 5 lbs. empty.
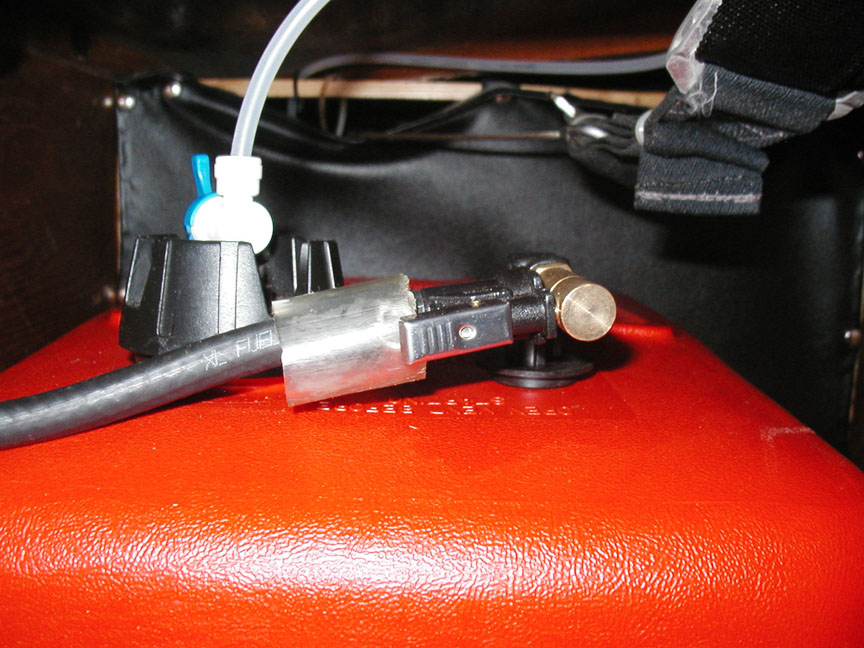
I ran a small plastic tube from the top of the baggage compartment
rearward and down to an inspection panel on the bottom of the
fuselage. One small hole drilled in that inspection panel was all
that was needed to run the vent line overboard. The line plugs
into the vent valve on the cap when installing the tank and once in
place the valve is opened to vent the tank. For removal I just
close the valve and unplug the line.
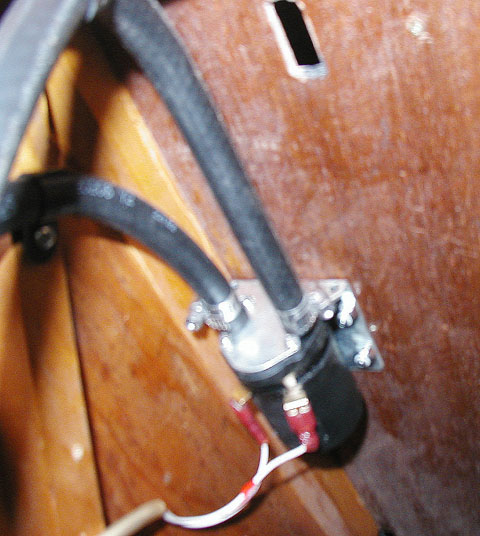 The main fuel line runs first to a small electric fuel
pump that transfers the fuel to the tank up in front of the instrument
panel. I did a lot of searching for a manual pump but couldn’t
find anything either durable enough or cheap enough to do the
job. Wobble pumps aren’t very common these days and are either
too big and heavy or remarkably costly. The pump I selected was
designed for RC model fuel transfer stations and was noted by various
sources as very reliable and leak proof. It’s made by Sig and is
amusingly called the Gas Passer. It cost about $35 and weighs
half a pound.
The main fuel line runs first to a small electric fuel
pump that transfers the fuel to the tank up in front of the instrument
panel. I did a lot of searching for a manual pump but couldn’t
find anything either durable enough or cheap enough to do the
job. Wobble pumps aren’t very common these days and are either
too big and heavy or remarkably costly. The pump I selected was
designed for RC model fuel transfer stations and was noted by various
sources as very reliable and leak proof. It’s made by Sig and is
amusingly called the Gas Passer. It cost about $35 and weighs
half a pound.
I showed it to my local rocket scientist-aircraft and engineering guru
and he approved though recommended mounting it above the tank to
prevent a massive fuel spill in the event it did spring a leak.
We tested it to draw 2 amps and pump about half a gallon a minute, well
within the perimeters of my miniscule electrical system. Transferring
one tank (6 gals) would use about half an amp and my gel cell is 12
amp/hours. This leaves plenty of juice for running the radio and
even the position lights and strobes. The pump was bolted to the
roof of the baggage compartment and its’ exit line then runs down to
the bottom of the fuselage and forward under the floorboards. It
emerges from below the floor just forward of where your knee is when
seated and runs up along the side wall till behind the instrument
panel. Here I used clear tubing so that I could see if fuel is
flowing.
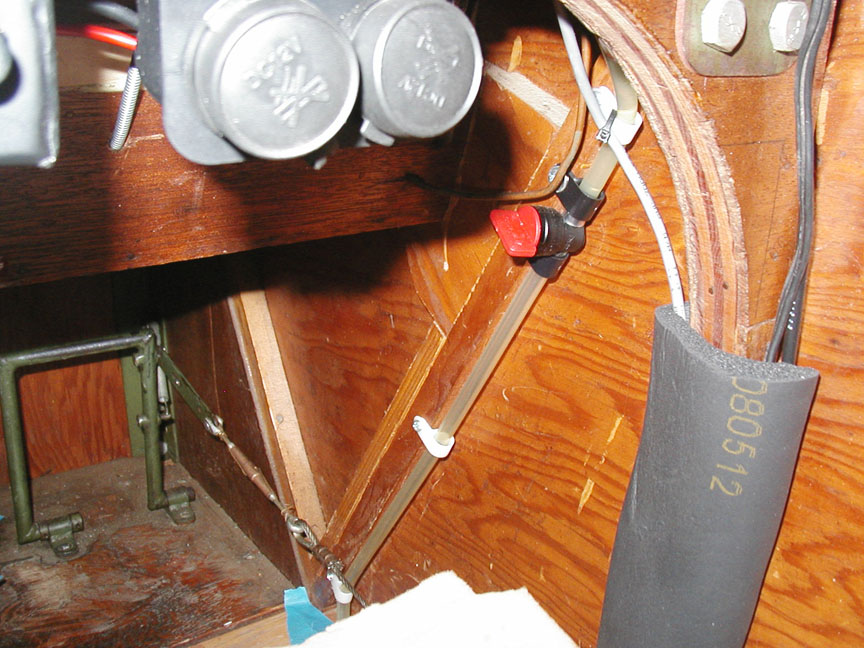
I placed a small shut-off valve in that section within reach so that it
can be closed to prevent the header tank from siphoning back to the
auxiliary tank and overboard through the aux vent. This could
only happen when the main tank is full but would be a real drag.
The aux fuel line enters the main tank through a small fitting near the
top of the tank. These fittings are a screw-in type available
from Spruce or Wag.
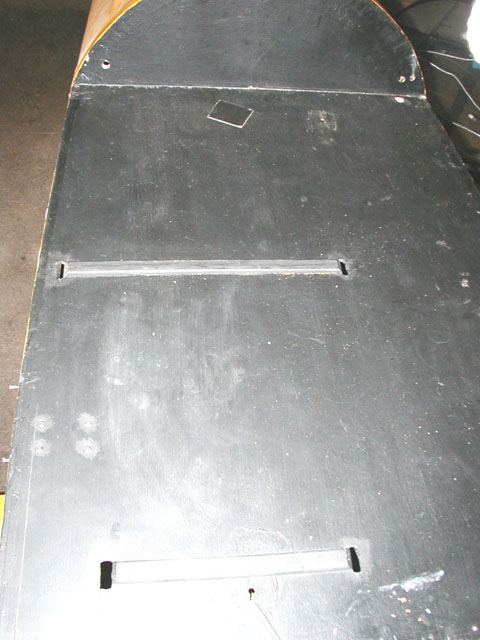 The final detail in the auxiliary system amounts to
securing the tank in the baggage compartment. A couple of bungee cords
hold it in place but I wanted more support to prevent it overloading
the baggage shelf when full. 36 lbs. is nearly the max weight for
that station and at several Gs, well in excess of what I felt the
structure could endure. The simple solution was to run a couple
of flat webbing straps under the tank and up to the top of the baggage
compartment. Here, they pass through the ply and over the top of
the structure. I even added a couple of reinforcing strips to the
plywood that provide extra strength by making it virtually
impossible for the webbing to pull through the roof of the baggage
compartment.
The final detail in the auxiliary system amounts to
securing the tank in the baggage compartment. A couple of bungee cords
hold it in place but I wanted more support to prevent it overloading
the baggage shelf when full. 36 lbs. is nearly the max weight for
that station and at several Gs, well in excess of what I felt the
structure could endure. The simple solution was to run a couple
of flat webbing straps under the tank and up to the top of the baggage
compartment. Here, they pass through the ply and over the top of
the structure. I even added a couple of reinforcing strips to the
plywood that provide extra strength by making it virtually
impossible for the webbing to pull through the roof of the baggage
compartment.
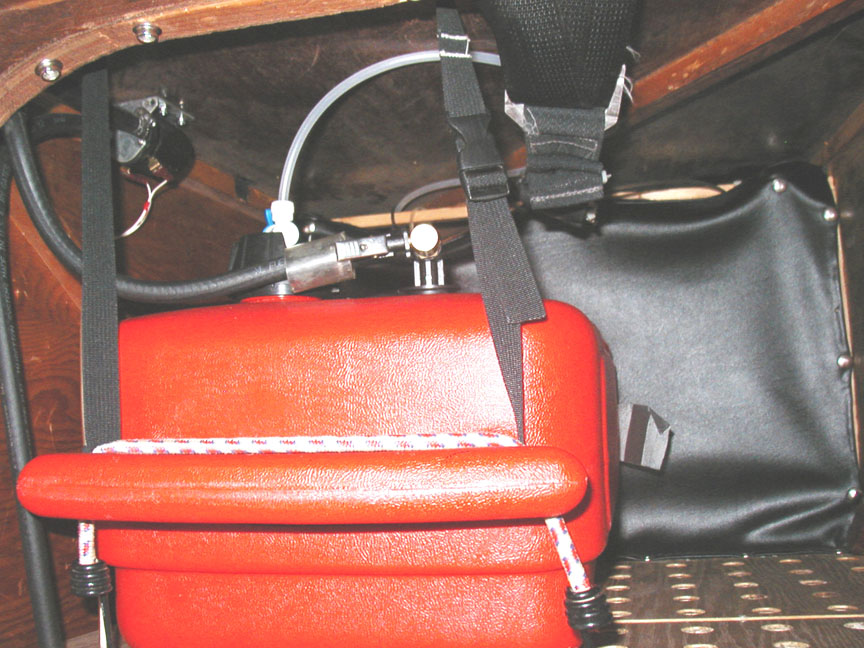
With these straps the auxiliary tank doesn’t even need the baggage
shelf to support it. A couple of quick links in the webbing
facilitate removal and installation though it is fairly fussy.
It’s strong, light weight, and cheap which is what really counts.
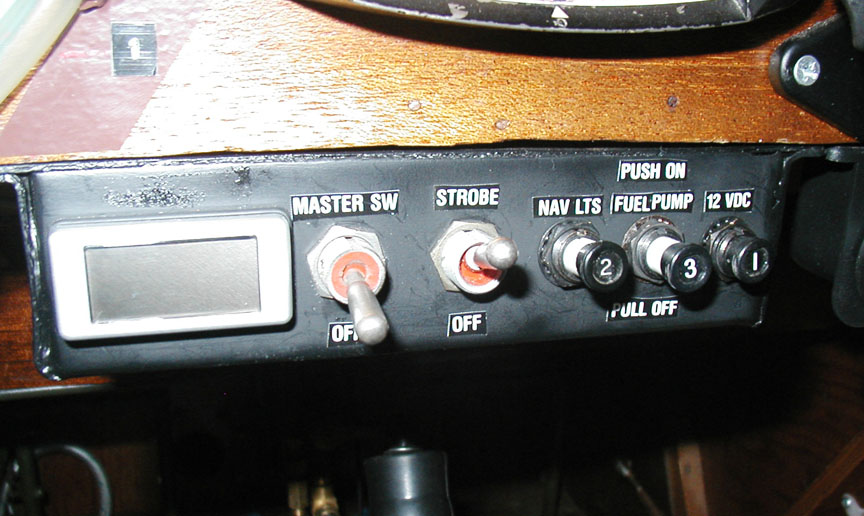
A simple 12 volt circuit breaker switch and a couple of wires to the
pump complete the installation.
Having 6 extra gallons of fuel to add to the 16 in the main tank is
really wonderful and totally worth the effort I put into the
installation. Even at full power I have about 4 hours of duration
with reserve. This is great for long cross country cruising but
it’s also really nice for local fun flying. I have a lot more
time to play around without worrying about fuel and can fuel up at the
home airport with cheap car gas instead of paying top dollar at
airports. And, if I ever get into a tricky situation were things
aren’t working out as planned that extra 6 gallons in “reserve” will be
awfully nice to have.

Matt Michael
 Return
to the Fly Baby Tech Talk Page
Return
to the Fly Baby Tech Talk Page